To create billable expenses in QuickBooks, you must first turn on the billable expense feature and set up additional preferences like the default markup rate. Then, create an expense, bill, or check as you normally would, mark the Billable checkbox, and select the customer or project associated with the expense. When you’re ready to bill the customer, QuickBooks lets you add the billable expense to your invoice.
This guide shows you how to make expenses billable in QuickBooks Online and how to add those expenses to customer invoices. We also cover when you should make expenses billable.
You can create QuickBooks billable expenses only with the Plus and Advanced versions.
Step 1: Turn on Billable Expenses
Click on the gear icon (⚙︎) in the upper-right corner and then select Account and settings.
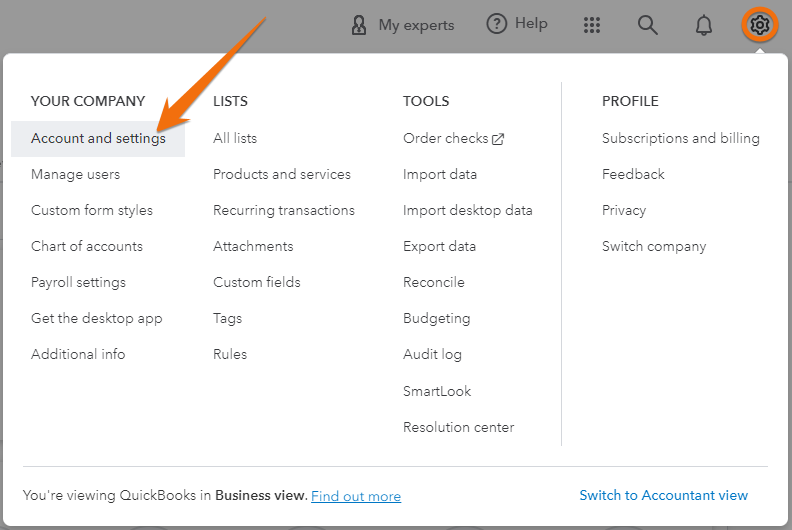
Navigate to “Account and settings”
From the Account and settings page, select Expenses, and then turn on billable expenses and configure additional settings. Essentially, you’ll need to focus on the following fields to enable billable expense tracking:
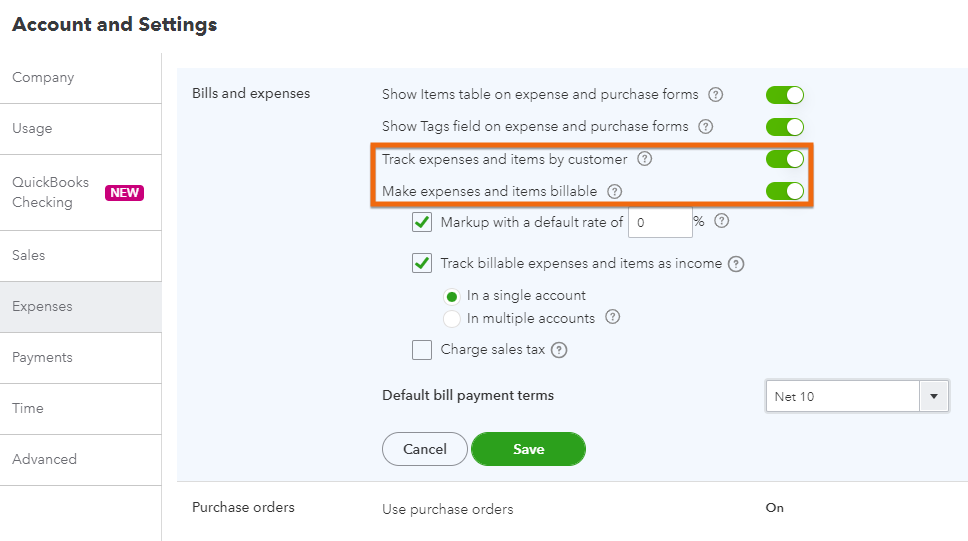

Setting up billable expenses in QuickBooks Online
- Track expenses and items by customer: When turned on, QuickBooks will add a customer field to your expense and purchase forms, allowing you to track items by customer.
- Make expenses and items billable: This allows you to make expenses, bills, and checks billable to customers in QuickBooks Online. When activated, you can configure additional settings:
- Mark up with a default rate: This enables you to specify a default markup rate that is applied to the cost of billable expenses. It will be an additional percentage added to the cost when billing the expense to the customer.
- Track billable expenses and items as income: This lets you specify how you account for the reimbursement of billable expenses. When turned on, the reimbursement including the applied markup will be reflected as an income. When left unchecked, the reimbursement directly reduces the total cost of the initial expense.
- Charge sales tax: This allows you to include sales tax on billable expenses, if applicable.
Once done, click the green Save button.
Step 2: Create the Billable Expense or Edit an Existing One
Next, proceed to create the new QuickBooks billable expense or edit an existing one. To create a new expense, click on the +New button in your dashboard and then select Expense, Bill, or Check in the Vendors column.
In the screenshot below, we’re creating a new expense.
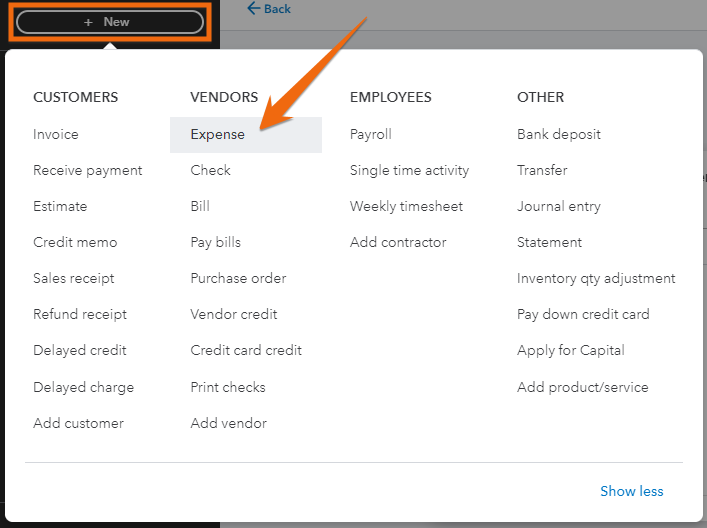

Preparing to create a new expense in QuickBooks Online
Complete the Expense form as you normally would and then mark the Billable checkbox. Also, you’ll need to specify the customer or project associated with the billable expense.
For instance, in the screenshot below, we purchased an air conditioning supply from Cool Breeze HVAC on behalf of a customer named Brian Cook and added a markup rate of 20%.
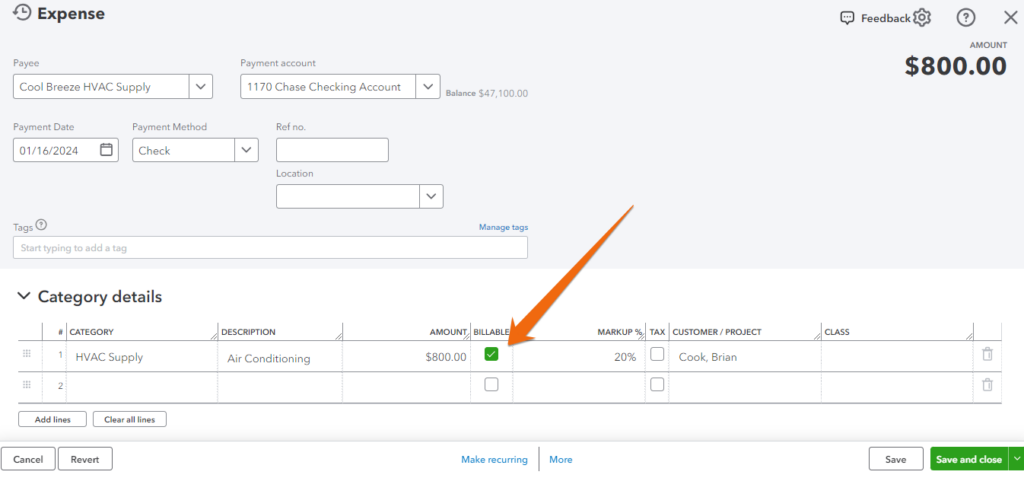

Marking an expense billable in QuickBooks Online
Click Save or Save and close to record the new billable expense.
To edit an existing expense, click on Expenses in the left navigation menu. Then, select the Expenses dropdown and find the item you wish to edit.
For instance, if we forgot to mark the billable expense field above, let’s locate the expense we created for Cool Breeze HVAC Supply, click View/Edit, and then mark the billable expense field. Again, once done, click Save or Save and close.
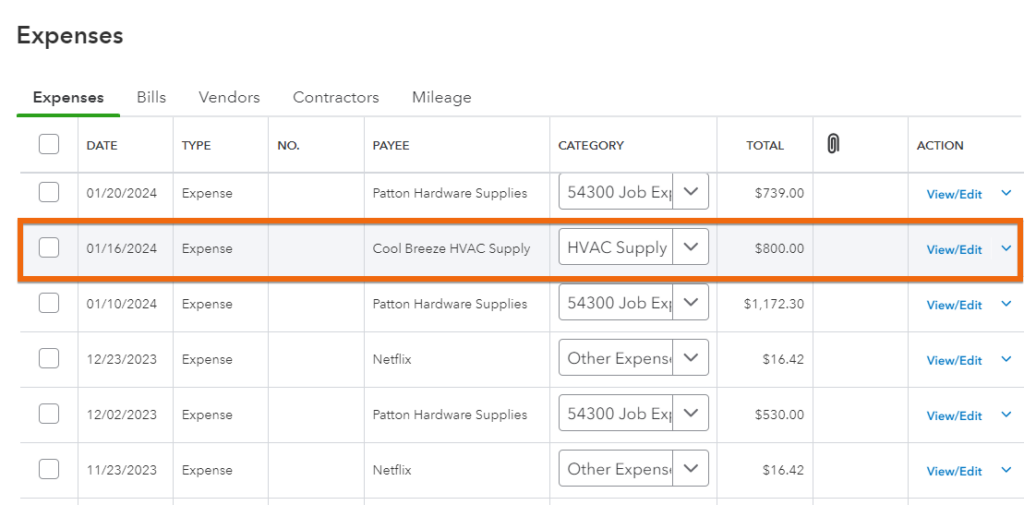

Looking for an existing expense to mark billable in QuickBooks
When marking a bill or a check billable to a customer, mark the Billable field, specify the customer or project, and include any applicable markup rate.
Step 3: Add the Billable Expense to Your Invoice
To have the cost reimbursed, you must include the billable expense in your customer invoice. When creating an invoice, QuickBooks will display the billable expenses associated with the selected customer and project (if applicable) automatically in the right sidebar. Click on Add, and the billable expense will be included in the invoice.
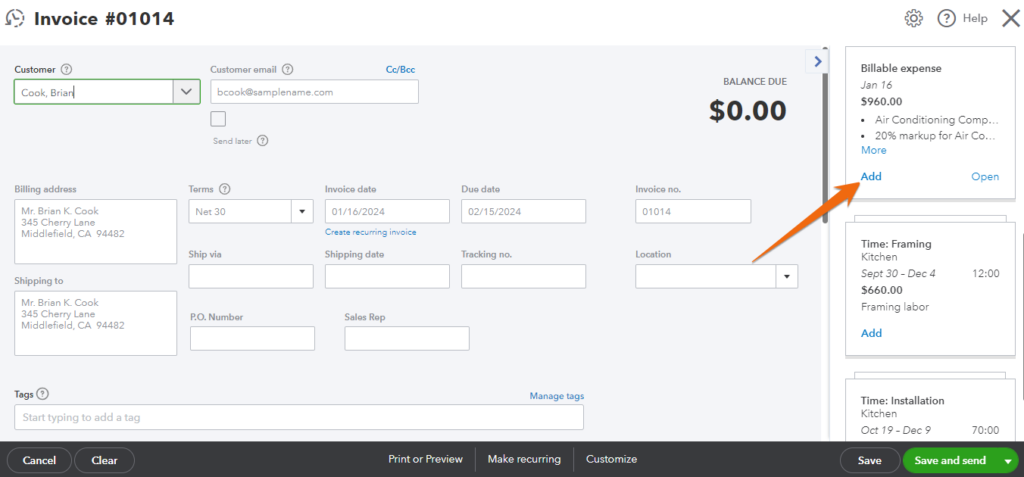

When the expense is added, QuickBooks will populate the relevant fields, including the amount, automatically. Also, QuickBooks will calculate the total billable expense, including the markup rate, automatically. In our invoice below, we are billing Brian Cook a total of $960, which includes the original cost of $800 plus the 20% markup.
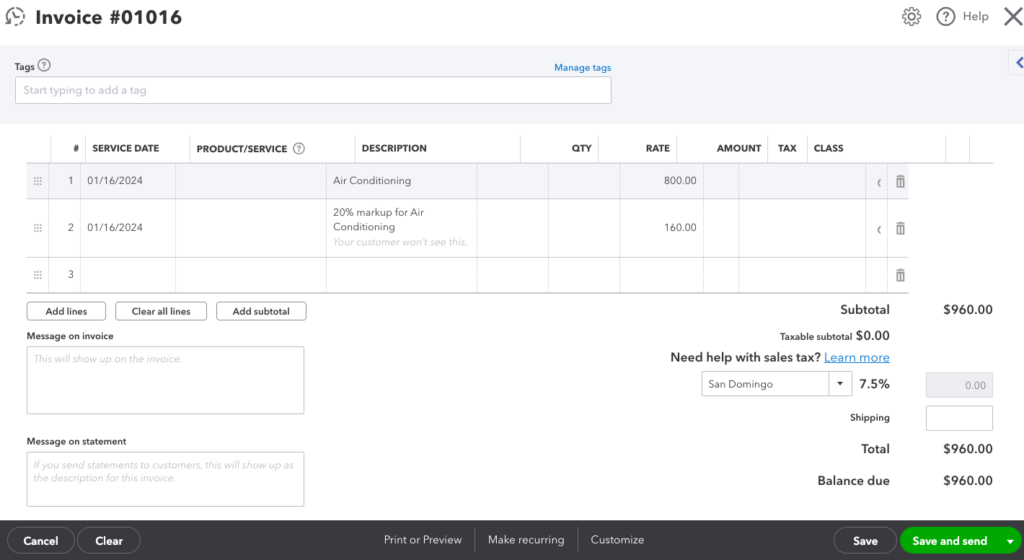

Billable expense added to a customer invoice in QuickBooks
Double-check that all the information is correct and make changes if needed. Then, click Save or Save and send.
If you need help with invoicing in QuickBooks, you may want to visit our tutorial on how to create and send invoices in QuickBooks Online.
When To Make Expenses Billable in QuickBooks Online
Generally, you should create a QuickBooks Online billable expense when you incur costs on behalf of a customer or project and you intend to pass those expenses to your customer when invoicing. For instance, if you are a plumbing company and you purchased materials to use on a job, you can mark the expense billable and then have the customer reimburse you when they make the payment for the invoice.
If you’re working on fixed-fee arrangements where you’ve agreed to do a project for an agreed-upon amount, then it doesn’t make sense to make expenses billable since you don’t need that detail on the customer invoice. In that case, you can still assign expenses to the customer/project to keep track of your profitability—but don’t mark the expenses as billable.
Frequently Asked Questions (FAQs)
The expense will be associated with a specific customer or project and will be available to add to the customer invoice the next time one is generated.
You can make expenses, bills, and checks billable in QuickBooks Online.
You’ll need to manually edit the expense and mark it as billable. Otherwise, it will be unavailable to add to your customer invoice.
Wrap Up
You’ve just learned how to make expenses billable in QuickBooks Online and include them in your customer invoices. To learn more about the other features of the platform, check out our free QuickBooks Online tutorials.

